LOV stands for List of Values.
2 types of LOV's
Run the page and see the output. The first page of the output looks like the following:
Step 1) Create Region by selecting project and select OAComponents and Select Region.
Step 2) Create VO and attach to AM.
Step 3) Create a page and attach AM.
Step 4) Under the region create one item and item style as Message LOV input.
Step 5) Under the Message LOV input region create on table region using wizard. In the table region select the proper package name and then as we attached our VO to the AM it will display our LOVVO so select that VO and therefore a table region will be created with one item under it.
Step 6) Select the Message LOV input item and in the Property Inspector of Message LOV input select External LOV
Run and see the Output.
2 types of LOV's
- Inline LOV
- External LOV
Step 1) Create Page Like Below.
Creating Inline LOV for Above Supplier Name
Step 2) Create VO and Attach to AM and change Supplier name field type to MessageLovInput.
Select Vendor_name,vendor_id from ap_suppliers
We can find List of Values
region under Message LOV Input item.
Right click on the List of
Values region select New -> Table Using Wizard…
Here we can create Table Style region only we cannot change the region
style to another one.
Select the SupplierName item
under the table region and then in the property Inspector of that item check
Search Allowed -- True
Selective Search Criteria –
True
Note - The first property
lets users search on these values in the LOV, and the second property ensures
that the users specify search criteria for at least one of these values to
avoid a blind query
Select LOV Mappings in the
structure of Message LOV input after that do the following changes in the
property inspector of lovMap1.
LOV Region Item : VendorName (the item to display in the LOV region)
Return Item : SupplierName(the item to return)
Criteria Item : SupplierName(criteria item works like in where condition value)
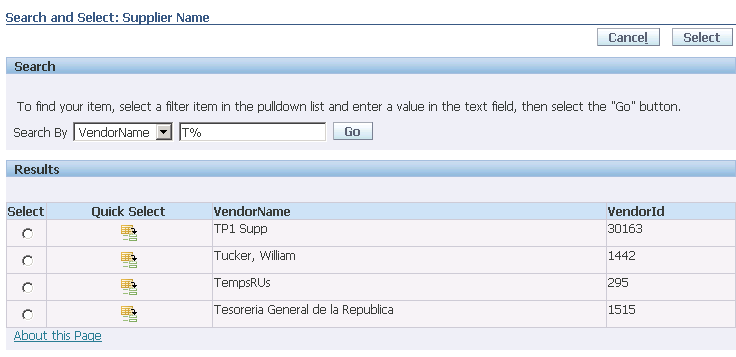
Run the page and see the output. The first page of the output looks like the following:
Click on The LOV Image
Creating External Lov for Above Page
Step 1) Create Region by selecting project and select OAComponents and Select Region.
Step 2) Create VO and attach to AM.
Step 3) Create a page and attach AM.
Step 4) Under the region create one item and item style as Message LOV input.
Step 5) Under the Message LOV input region create on table region using wizard. In the table region select the proper package name and then as we attached our VO to the AM it will display our LOVVO so select that VO and therefore a table region will be created with one item under it.
Step 6) Select the Message LOV input item and in the Property Inspector of Message LOV input select External LOV
 |
| Add caption |
Run and see the Output.


No comments:
Post a Comment